Introduction to Amazone Virtual Private Cloud (VPC)
So what is VPC is?
Think of a VPC as a Virtual data center in the Cloud
Amazon Virtual Private Cloud lets you provision a logically isolated section of an AWS cloud where you can launch AWS resource in a Virtual network that defines.
Additionally, You can create a hardware Virtual Privet Network (VPN) Connection between your Corporate datacenter and your VPC leverage the AWS cloud as an extension of your corporate datacenter
What is a VPC Looks like?
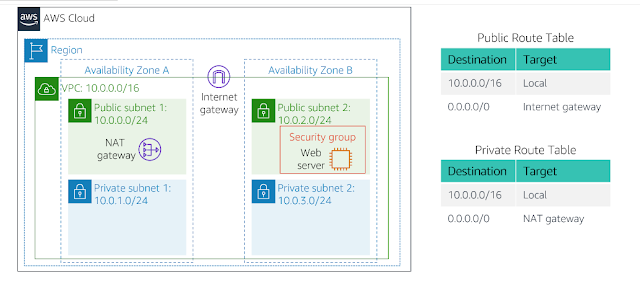
This is the Logical view of a VPC that we are going to create now. In the above image, we can see that under the Region (us-east-1b) the region that I'm going to use We can create a VPC (MY VPC name is Lab VPC, IP 10.0.0.0/16) inside my VPC there is going to be Two availability zones with four different Subnets 2 will be Public and 2 will we Privet. We are going to connect this VPC by the Internet gateway provide internet access Inside Our Subnets we have our Security groups that protect our Instancesesc
Note-:
You can use any name that you prefer for your VPC name.
Different between Public subnet and Privet subnet is if you want to access the privet subnet It will only be accessed via VPN or go through the public network and SSH form your public network.
Allways One Subnet equals one availability Zone.
Eg-: 10.0.2.0/24 you can not use this subnet anywhere else.
Internal Ip address range that you can use in Amazone
10.0.0.0. -10.255.255.255 (10/8 Prefix) - Highest Address Range
172.16.0.0. -172.31.255.255.255 (172.16/12 Prefix) - Medium Address Range
192.168.0.0 - 192.168.255.255 (192.168./16Prefix) - Smallest Address Range
What can we do with VPC
Lunch Instances into a Subnet of your choice
Assign custom IP address ranges in each subnet
Configure route tables between subnets
Route table basically say which subnet is allowed to speak to which another subnet or We can specifically stop one subnet been able to communicate to another subnet within a VPC
Create internet gateways and attached into our VPC
We can only have one internet gateway for one VPC
Much better security control over your AWS resources
You can use Subnets, Specific IP address, NACL, can move Instance into privet subnets (Stop people from accessing them)
Instance security groups
Security Group can span availability zone, Security group can have Multiple availability zones, therefor spanning multiple subnets as well.
Subnet Network access control lists (ACLS)
Using This You can Block IP Adress
Default VPC vs Custome VPC
Default VPC is User friendly allowing you to immediately deploy the VPC.
All the Subnet in default VPC has a Route out to the internet.
Each EC2 Instance has both a public and private IP address.
VPC Peering
We can have Multiple VPC. If we Isolate one set of Resource from another but those resources need to talk to each other. To do that we can use VPC Peering.
Allo you to connect one VPC with another via direct network route using a private IP address.
Instance with one subnet inside different VPC and another Subnet, in another VPC, with another Instancecan communicate using a Private IP address
Instance Act as if they were on the same Private network when peer the VPC
You can Peer VPC with other AWS accounts as well as with other VPC in the same account.
If you have a two AWS account and you are able to peer VPC in the both of the accounts
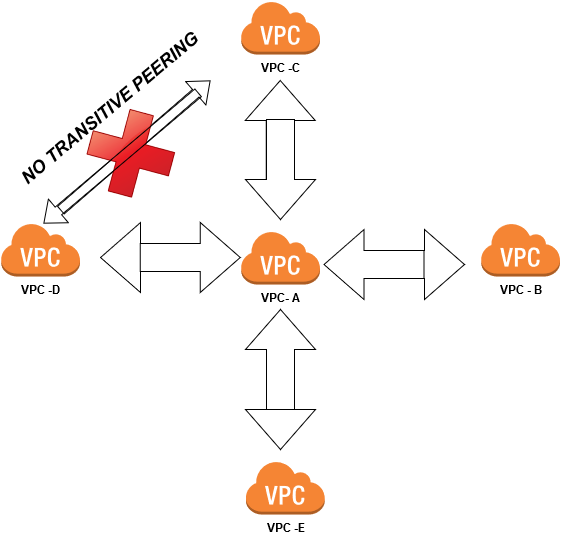
Peering is in Star Configuration NO TRANSITIVE PEERING
Scenario -:Build your VPC and Launch a Web Server
To do this you have to log in to your Amazone account
Creating a VPC
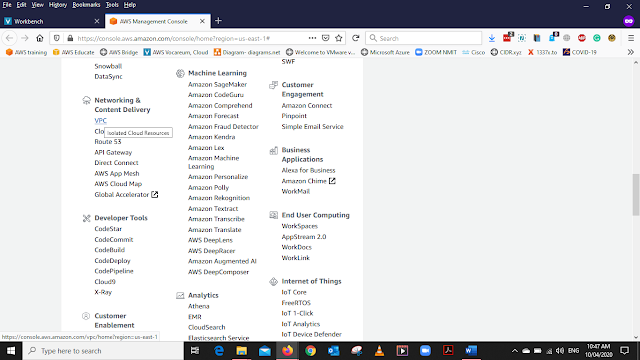
After login to your account go to the services and under NETWORKING & CONTENT DELIVERY select VPC or use the search bar and type VPC
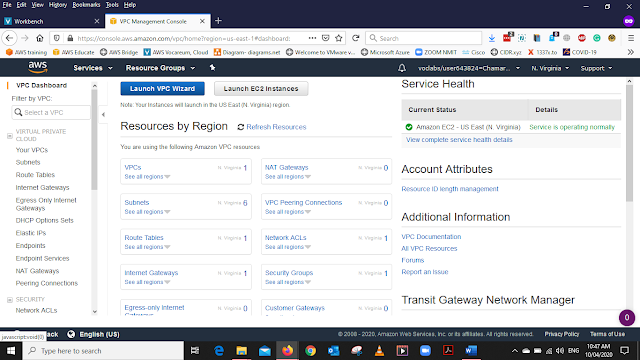
From VPC Dashboard select Lunch VPC Wizard.
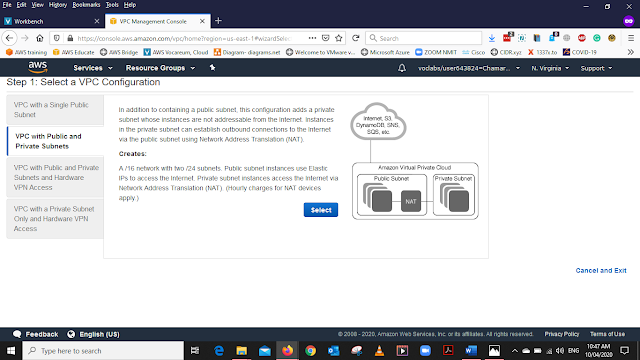
Then we will get the VPC configuration menu from the left side List select VPC with Public and Private Subnet and Press Select
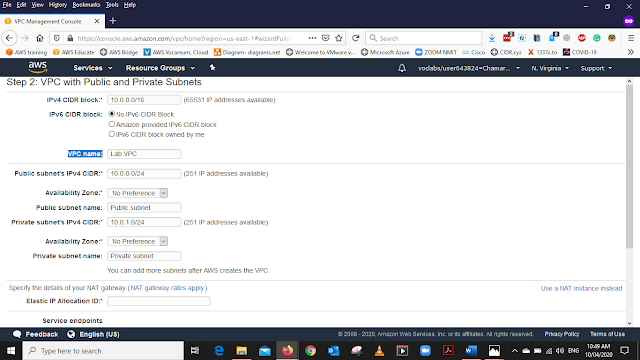
Next window will be VPC with Public and Private Subnet
in this form fill the following
Availability Zone - us-east-1a
Public subnet name - Public subnet 1
Availability Zone - us-east-1a *
Public subnet name - Private subnet 1
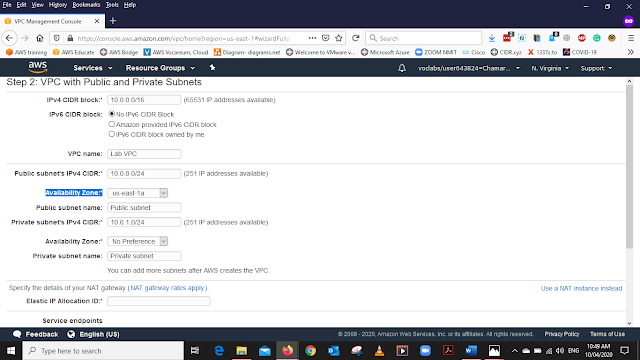
Availability Zone - us-east-1a
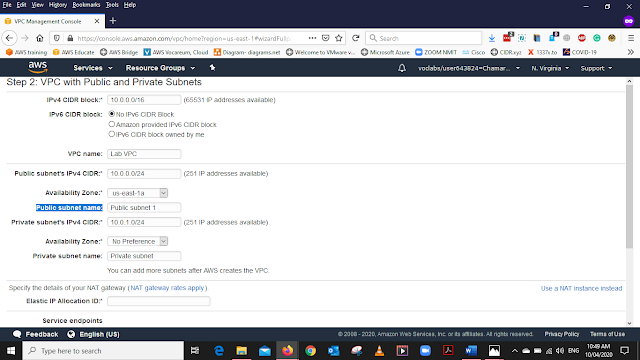
Public subnet name - Public subnet 1
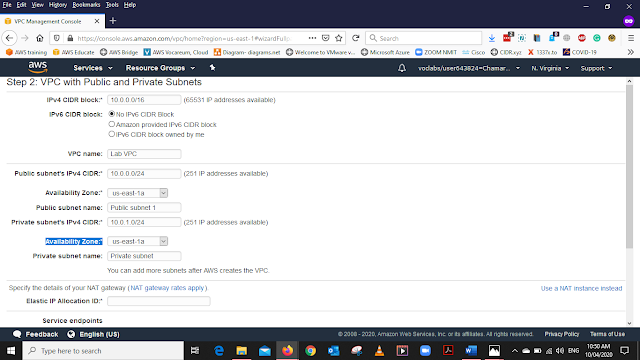
Availability Zone - us-east-1a *
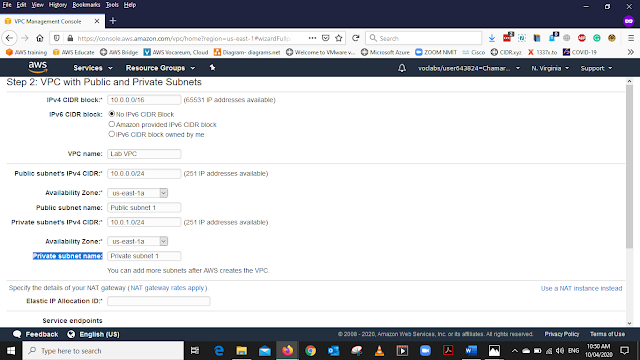
Public subnet name - Private subnet 1
* There are two availability zones this is second
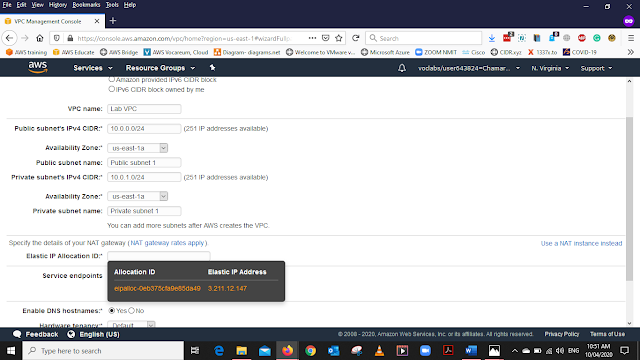
Select the Default Elastic IP Allocation ID as shown in the image
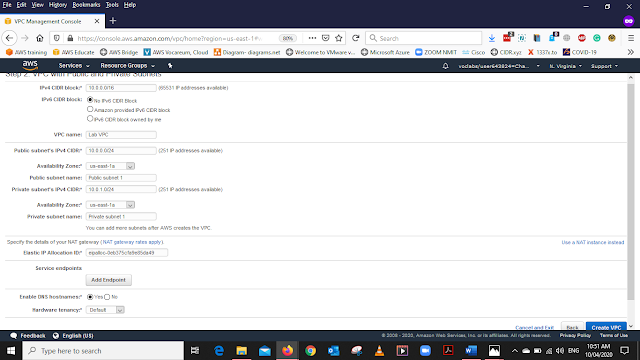
Final configuration of the VPC with Public and Private Subnet Press Create VPC
Creating the VPC...
VPC has Created Successfully Press OK
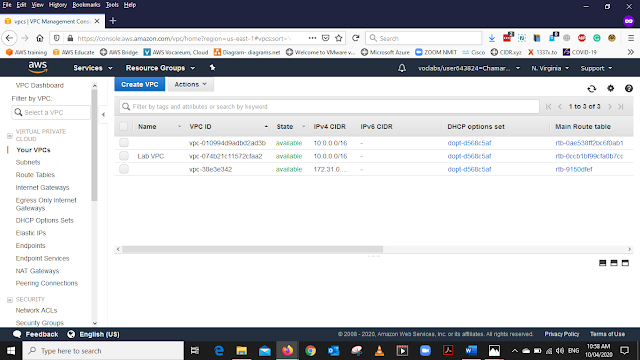
The VPC we have created
Creating the Subnet
In the VPC dashboard, from the left side menu Select Subnet and Select create Subnet
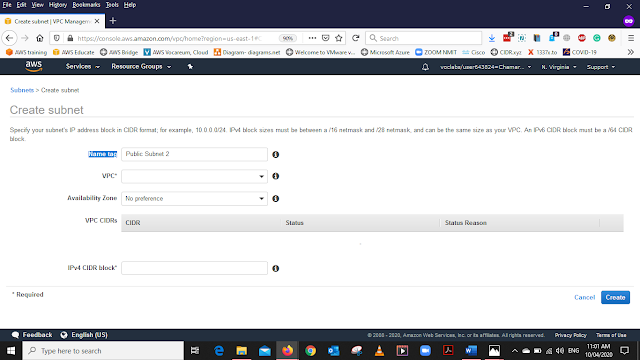
Select the Name Tag Public Subnet 2
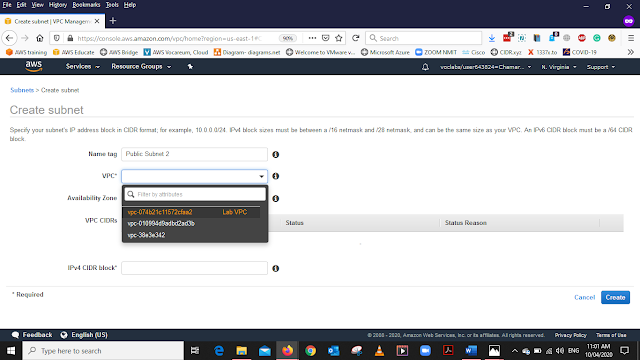
Select the VPC that we have created
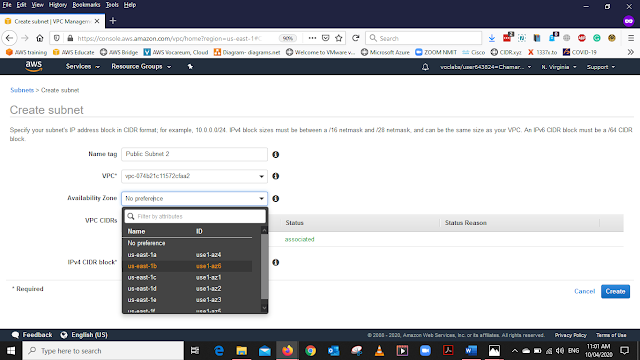
Select the Availability Zone us-east-1b
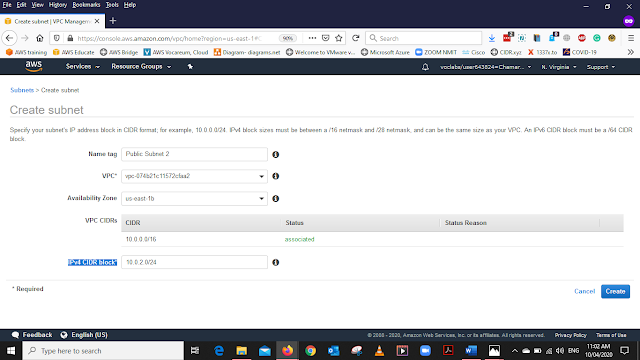
Enter the IPv4 CIDR block as 10.0.2.0/24 and select Create
After Creating the second subnet, subnet table will show the available subnets
Creating the Route Table
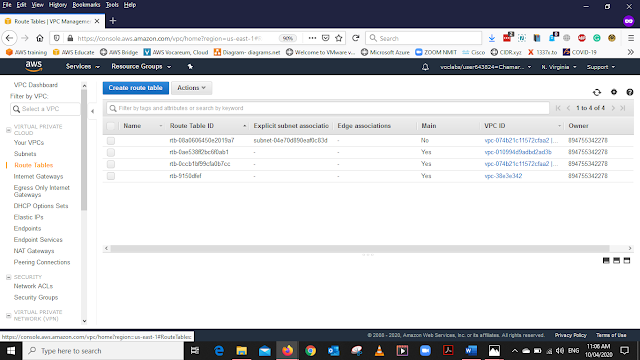
In the VPC dashboard, from the left side menu Under Virtual Private Cloud Select Route Tables
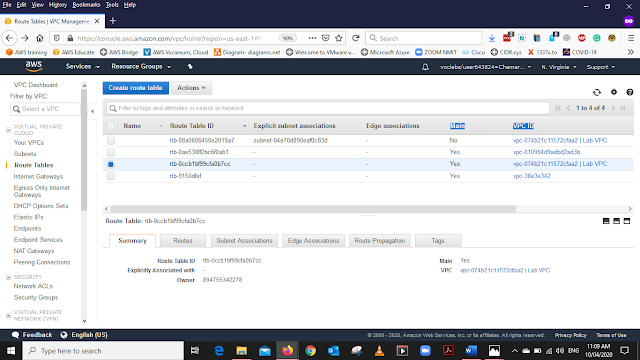
In the Main Route Table, you can find your routes Select the one with
Main status = YES
VPC ID = vpc-074b21c11572cfaa2 | Lab VPC (The VPC we created)
Note -: When you create a VPC it automatically creates the Main Route table that you can find it easily by Checking the VPC name and Under the MAIN column Status should be "YES"
Select that route and Rename it as Privet Route Table (use the pencil icon to rename the routing table)
After renaming the Route table select it, from the bottom menu list select Subnet Associations and select Edit Subnet Associations.
From the list select the Privet Subnet 1 and 2 Save it
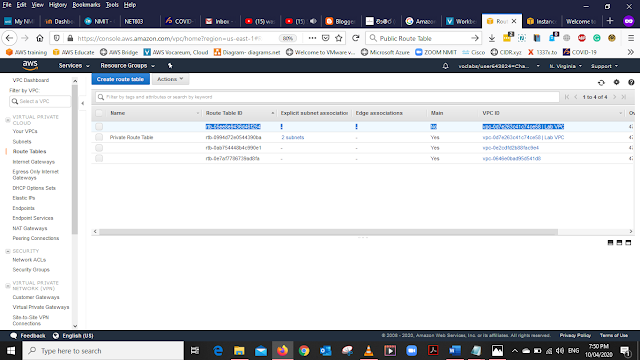
In the Main Route Table, you can find your routes Select the one with
main status = NO
VPC ID = vpc-074b21c11572cfaa2 | Lab VPC (The VPC we created)
Select that route and Rename it as Public Route Table (use the pencil icon to rename the routing table)
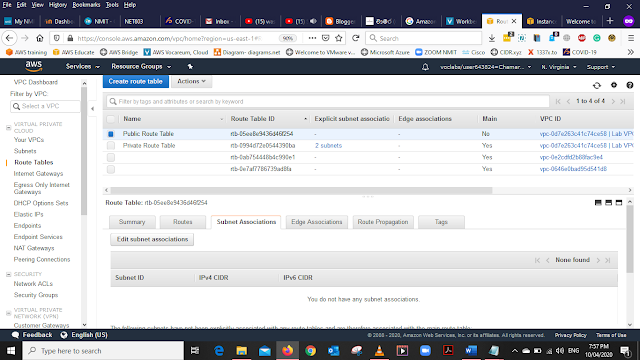
After renaming the Route table select it, from the bottom menu list select Subnet Associations and select Edit Subnet Associations.
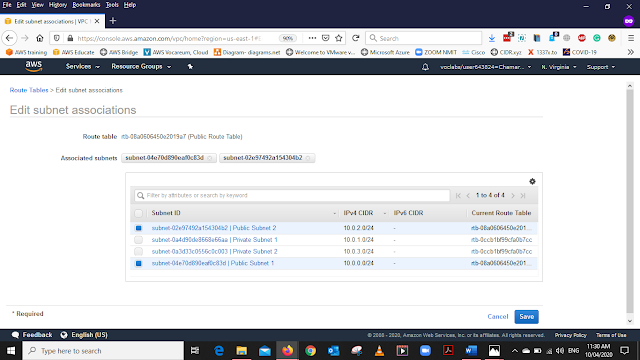
From the list select the Public Subnet 1 and 2 Save it
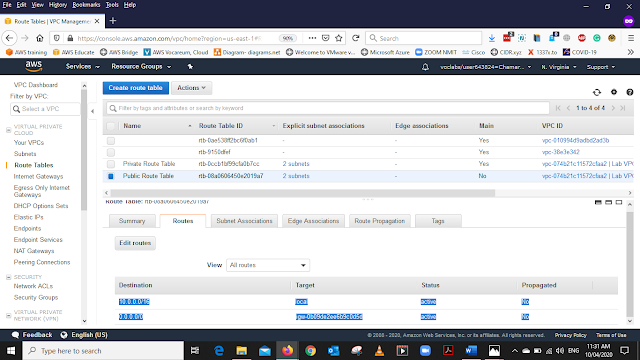
After Renaming and adding the Subnet Associations and in the Route tab we can see that for Public Route the default internet gateway has added ("igw-0b09de2ee6b9c0d5d")
Creating the Security Group
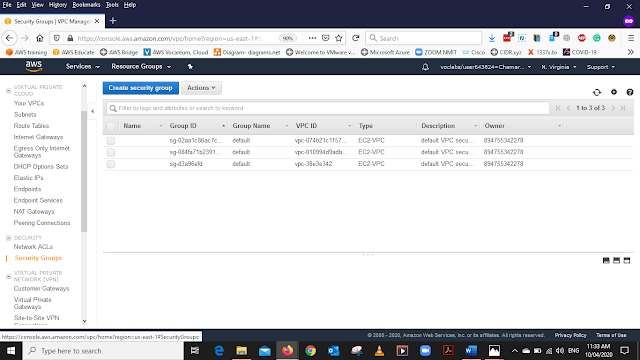
In the VPC dashboard, from the left side menu Under Virtual Private Cloud Select Security Groups. Select Create Security Groups

In the form add the details as below and select Create
Security Group Name - Web Security Group (Can put any name you prefer )
Description - Enable HTTP Acess (Can put any Description you prefer )
VPC - vpc-074b21c11572cfaa2
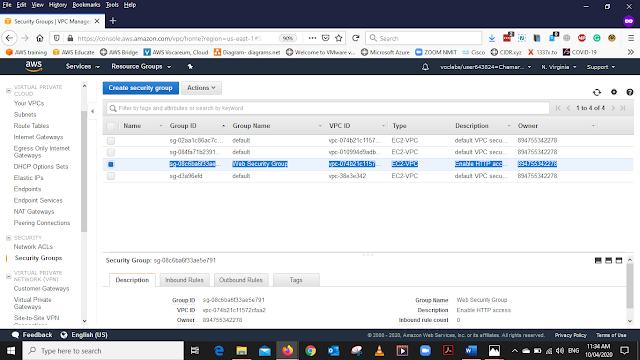
After Creating the Security Group you can view the Group You created
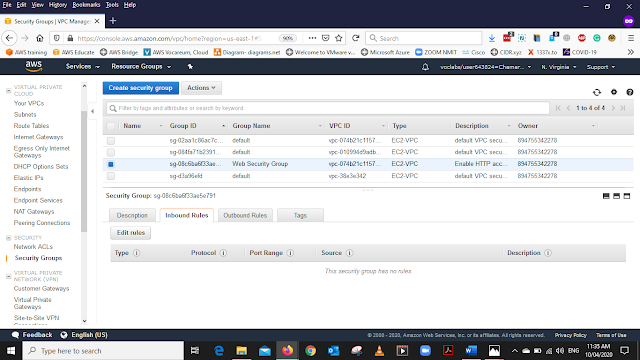
Now We are going to create the Rules. Select the "INBOUND RULES " from the bottom menu and select Edit Rules
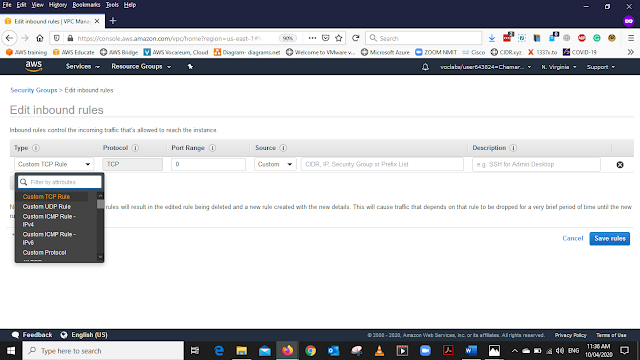
Select Add Rule and add the details as below
Type- HTTP
Source- Anywhere
Description - Permit Web Request
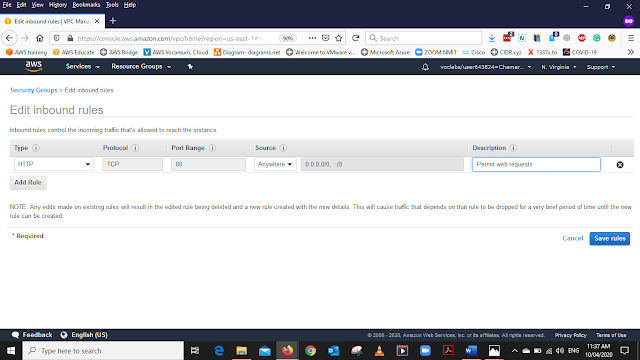
After Adding all the details Click Save Rules
Creating the Elastic Computer Cloud (EC2)

Go to the services and under Computers select EC2 or use the search bar and type EC2
In New EC2 Experienc Select Instances and Select Launch Instances
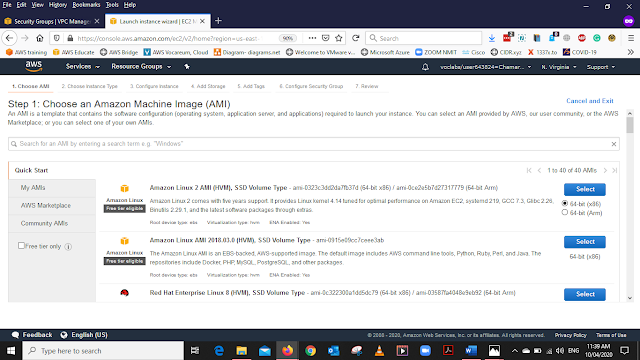
In Amazone Machine Image(AMI) Select the Amazone Linux 2 AMI 64 BIT
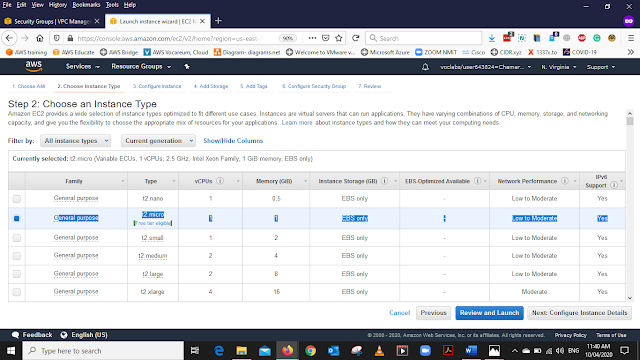
Chose the Instance Type as General Purpose as it in the above image. Then Click Configure Instance Details
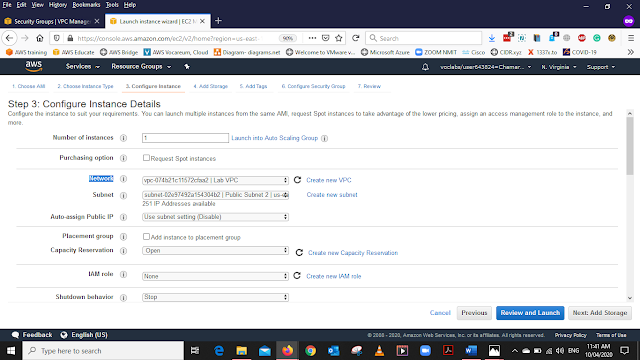
In the Configure Instance, Details Add the below details
Network - LAB VPC (The VPC you create)
Subnet - Public Subnet 2
Auto-assign Public IP - Enable
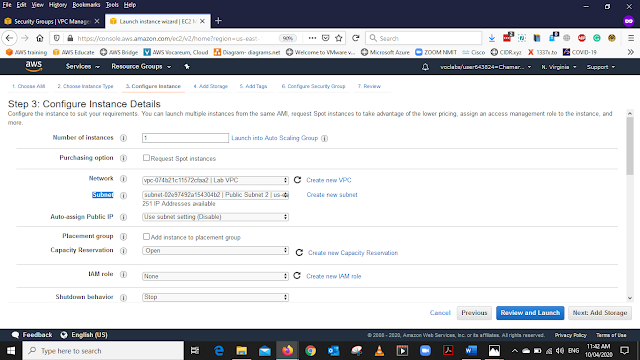
Subnet - Public Subnet 2
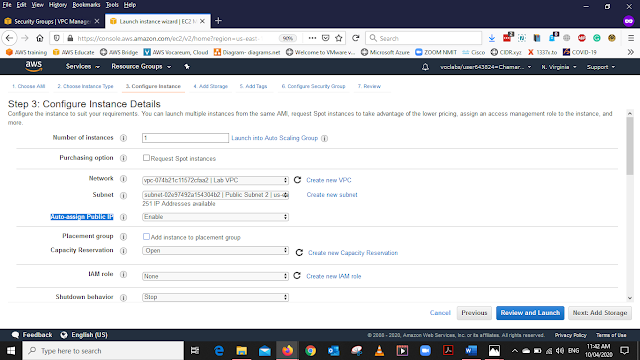
Auto-assign Public IP - Enable
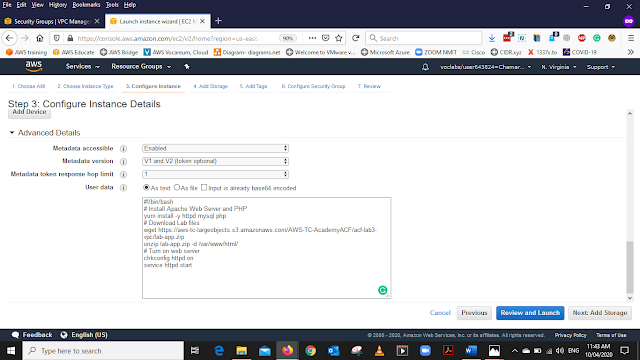
Move to the Advance details Tab and Copy and Paste the below code to User Databox and select Review and Lunch the Instance
#!/bin/bash
# Install Apache Web Server and PHP
yum install -y httpd mysql php
# Download Lab files
wget https://aws-tc-largeobjects.s3.amazonaws.com/AWS-TC-AcademyACF/acf-lab3-vpc/lab-app.zip
unzip lab-app.zip -d /var/www/html/
# Turn on web server
chkconfig httpd on
service httpd start
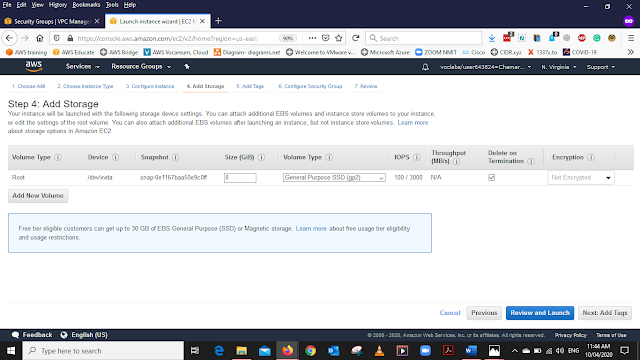
In the Add Storage Tab keep the default settings
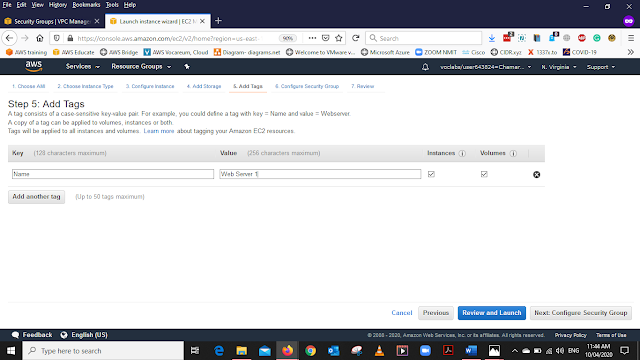
In the Add tags Tab Select Add Tag as below
Key - Name
Value - Web Server 1
In the Configure Security Group, Select an Existing Security Group select (the Security Group that we have created) and select Review and Lunch
There will be a "warning" when Launching the Instance select Continue
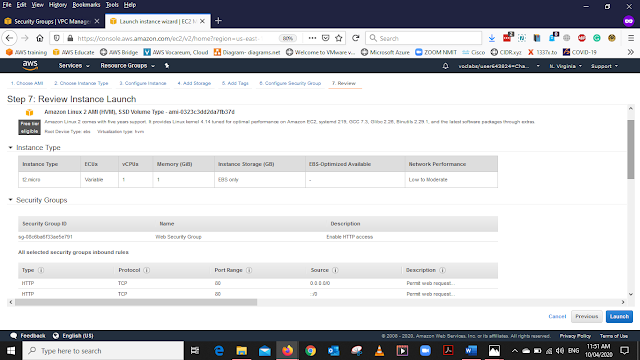
The last Tab will be Review Instance Launch Select Launch
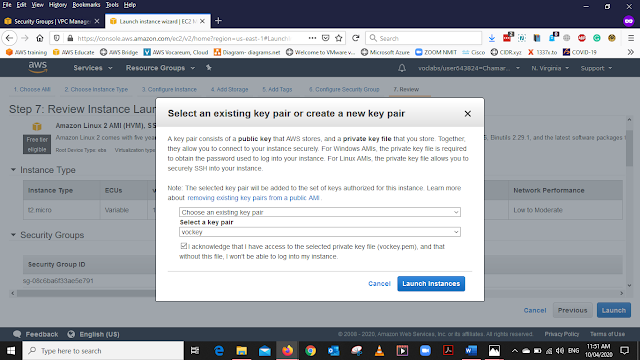
You will Ask to select the KEY PAIR select the Chose and existing key pair and put the tick in I acknowledge that I have access to the .....
Select Lunch Instance
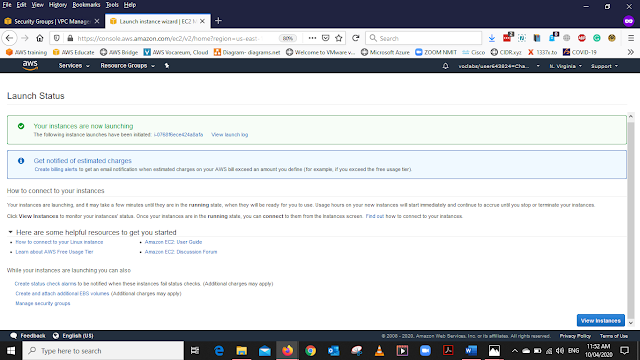
After launching the instance we will get the Launch status in that click View Instance
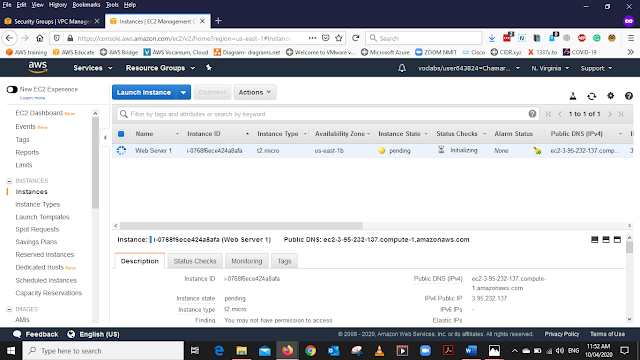
The instance is still Pending
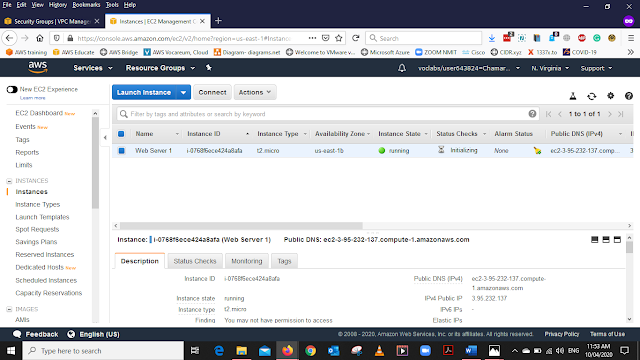
The instance is Up and Running
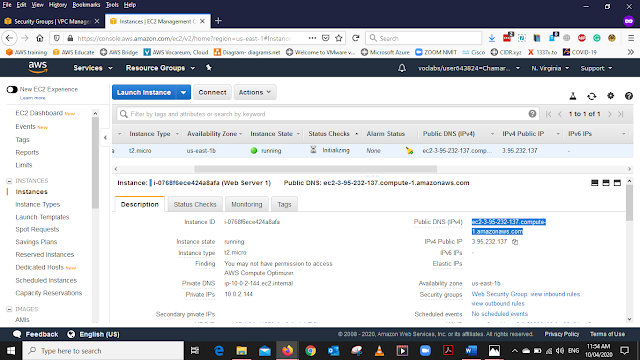
When the instance is Up and Running Select the instance and form the Bottom Menu Select the Description Tab Copy the Public DNS (IPv4) address and Open that link in a new tab in your Web browser
If all services are running properly We Should be able to get this web Page
Issues that I have faced when configuring the VPC
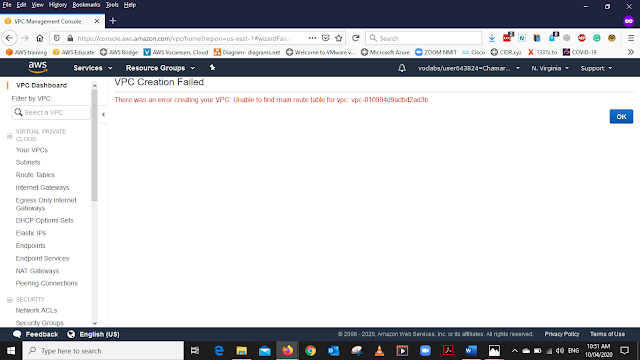
When the First time I Create the VPC I got this error and I have to refresh the page and Create it again.
Click hear to Visit my Facebook


No comments:
Post a Comment