Working with AWS Elastic Block Store (EBS)
What is EBS?
Well EBS basically stands for an Elastic Block Store and essentially it's a virtual hard disk in the cloud. It provides persistent block storage volumes for use with Amazon EC2 instances in the AWS cloud and each Amazon EBS volume is automatically replicated within its own Availability Zone (AZ) to protect you from component failure which is offering high availability and durability.
So all EBS is a virtual hard disk drive in the cloud and it comes in five variations.
Provisioned IOPS which has also SSD but ,this is where you want really fast input outputs per second.
Throughput optimizes hard disk drive. This is actually a physical hard disk drive, it's not SSD it's magnetic. So this is where it's going to be optimized for throughput.
Cold hard disk drive, this is magnetic
Benefits of the EBS
Data availability
Data persistence
Snapshots
Data encryption
Flexibility
Compare of EBS Types
Image Source
Scenario -: Create a Volume, Attached it to Instances and Take Snapshots
To do this you have to log in to your Amazone account
Creating a New Volume to the EC2 Instances
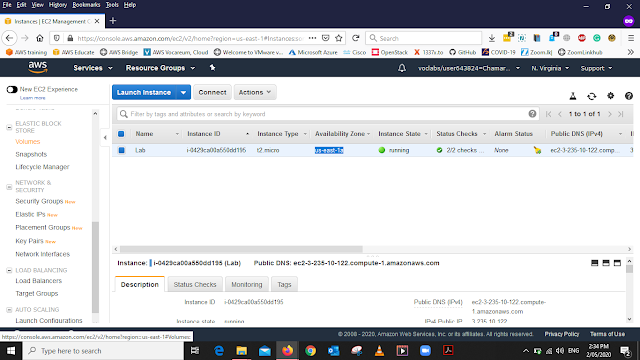
To create a volume We have to go to the Volume tab in the left side of the AWS pannel
Note Your Instance Should be in the same Region as your AZ
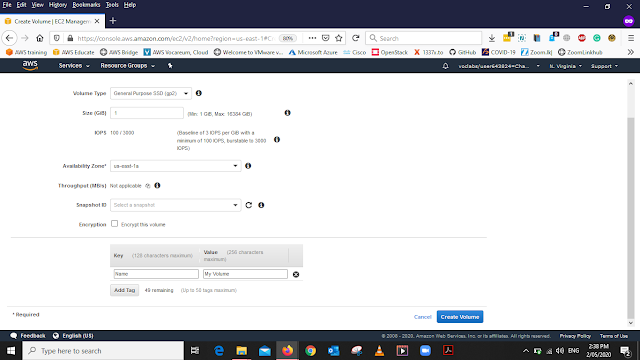
When we create the Volume we have to add the details as below
Volume Type: General Purpose SSD (gp2)
Size (GiB): 1
Availability Zone: Select the same availability zone as Same your EC2 instance.
We have to Add a Tag also It should be
Key: Name
Value: My Volume
After adding all the details Click Create
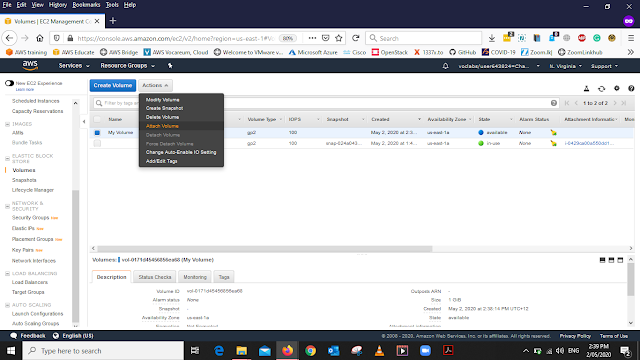
Now We have to attach the Volume to the EC2 Instances to do that
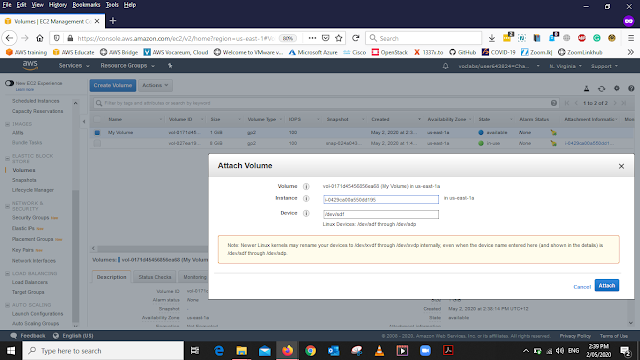
To do that, go to the Action Tab and select the Attached Volume and the above window will pop up. From that Select, the Instance That you want to attach the Volume Then Click attach
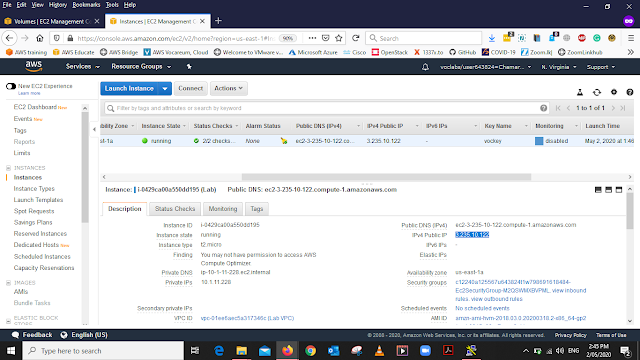
Now Go to the Instances and Copy the IP of the Machine This will help us to Connect to the machine Using SSH
Connect to the Instances using SSH
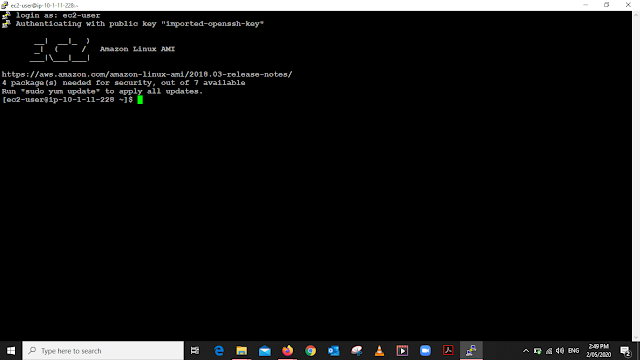
To Connect using SSH we need few Things Such as
Note-:
When you are creating an Instance it will ask You to create a KeypairAfter creating the Keypair Download it and keep it safe.
When you have all the things that mention in the above list Connect to the Instance using the IP that you have copied earlier If You can not find the IP go to the Instance and Get the IP from the Description tab
When the Console Promet the Login Enter your Login name.
AWS Default user would be this
User name - ec2-user
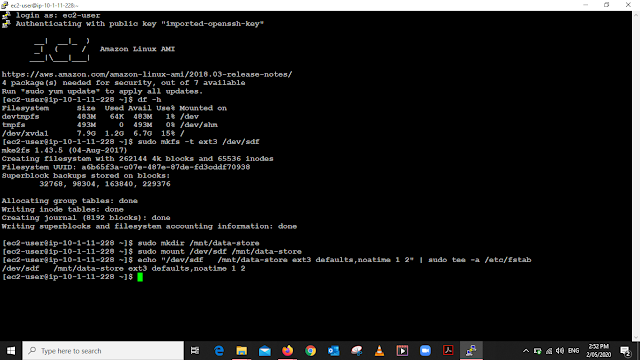
Now we are going to view the Stage available as in the Above image these commands will help to Mount the new Volume Create ext3 File system and Crate Directory.
Cont...
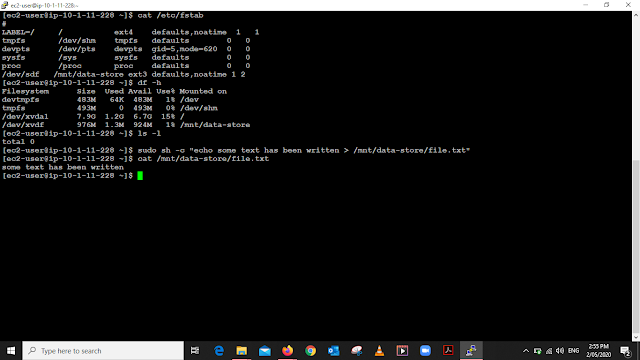
Cont...
In the above commands, will help to View the configuration file, View the Storage again, Create a TXT file and Help to verify the TXT file
Do not close the terminal we nee this for further Configurations
Create an Amazon EBS Snapshot
Snapshots-: Snapshot helps you to Role back. For instance, we have fresh Install OS and before installing any packages we are going to take a Snapshot. After taking the Snapshot we will install an application. After installing the application if we feel that we won't to role back to the Fresh install again, using Snapshot we can do that very easily. We just have to Select snapshots that you want to restore.
Note-: We can create a snapshot of the root Volume Make it as an Image and Deploy it another AZ
In this lab, we have created a snapshot of the Volume
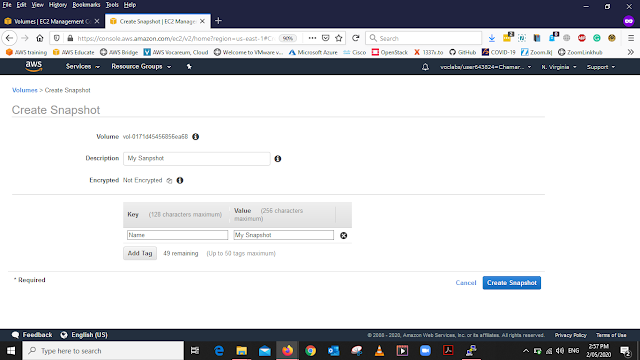
To create a Snapshot. We have to go to the Action Tab and Select Create Snapshot.
Add the details below
Key: Name
Value: My Snapshot
Note-: Description is optional if you like you can add it
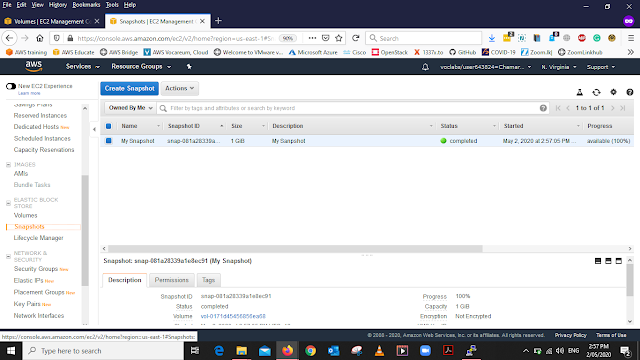
After Creta the Snapshot you will be able to see your Snapshot
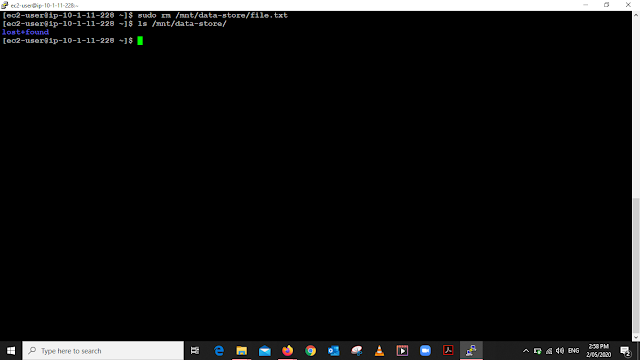
Use the Below Coomad to delete the Volume that we have created Earlier
sudo rm /mnt/data-store/file.txt
Use this command to view the file has been deleted
ls /mnt/data-store/
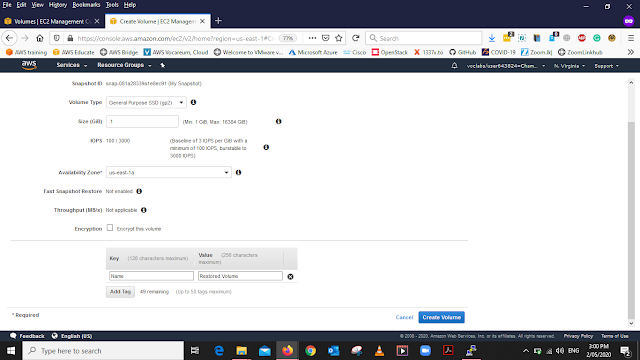
Volume Type: General Purpose SSD (gp2)
Size (GiB): 1.
Availability Zone: Select the same availability zone as Same your EC2 instance.
We have to Add a Tag also It should be
Key: Name
Value: Restored Volume
After adding all the details Click Create
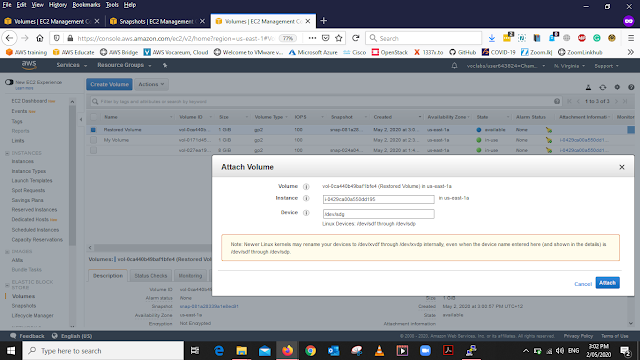
Now We have to attach the Volume to the EC2 Instances
To do that go to the Action Tab and select Attached Volume and the above window will pop up from that Select the Instance That you want to attach the Volume Then Click Attach
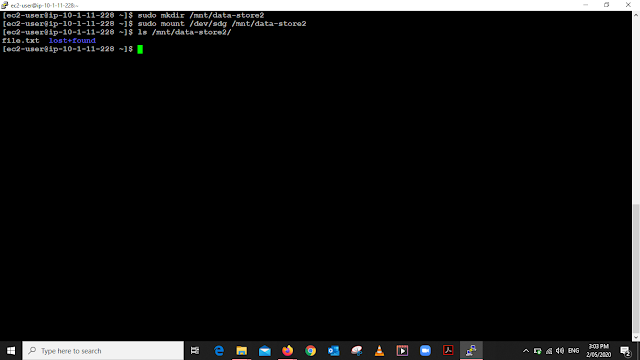
After Resorter the Volume Use the above commands to
Create a directory, Mount the new Volume and finally, Veryfthe Volume has been mounted.
References -:


No comments:
Post a Comment